When you invest in an off-grid electrical setup for a campervan, RV, or cabin, reliability and serviceability are everything. Most portable power stations on the market today are sealed inside rigid plastic shells. If a fuse pops or an internal component needs inspecting, you often have to crack open plastic clips, risking permanent damage to the casing.
After using Comvolt power stations for over two years in a custom Mercedes Sprinter campervan build, it was time to put them to the ultimate test: a complete internal teardown of both the Comvolt 2200 and the Comvolt 4200.
Watch the full step-by-step teardown below to see how these units are engineered on the inside:
Why Metal Construction & Serviceability Matter
Traditional plastic-cased power stations have a major flaw: they are built as single-use “throwaway” appliances. Once the plastic housing is snapped together at the factory, servicing them at home is nearly impossible without snapping tabs or marring the finish.
Comvolt takes a completely different approach with an all-metal, heavy-duty housing held together by standard 4 mm hex bolts. With a simple hex bit and a power tool, you can remove the outer shell in minutes without damaging the structural integrity or aesthetics of the unit.
Beyond serviceability, the metal shell provides superior heat dissipation and significantly higher power density:
-
49% Smaller & Lighter: Compared to equivalent plastic-housed power stations, the metal chassis allows the Comvolt 2200 to achieve a much smaller physical volume and lower overall weight while delivering full rated output.
-
Rugged All-Weather Protection: The aluminum construction acts as a heat sink while shielding sensitive internal electronics against vibration, off-road driving, and harsh environments.
Part 1: Comvolt 2200 Teardown & Internal Architecture
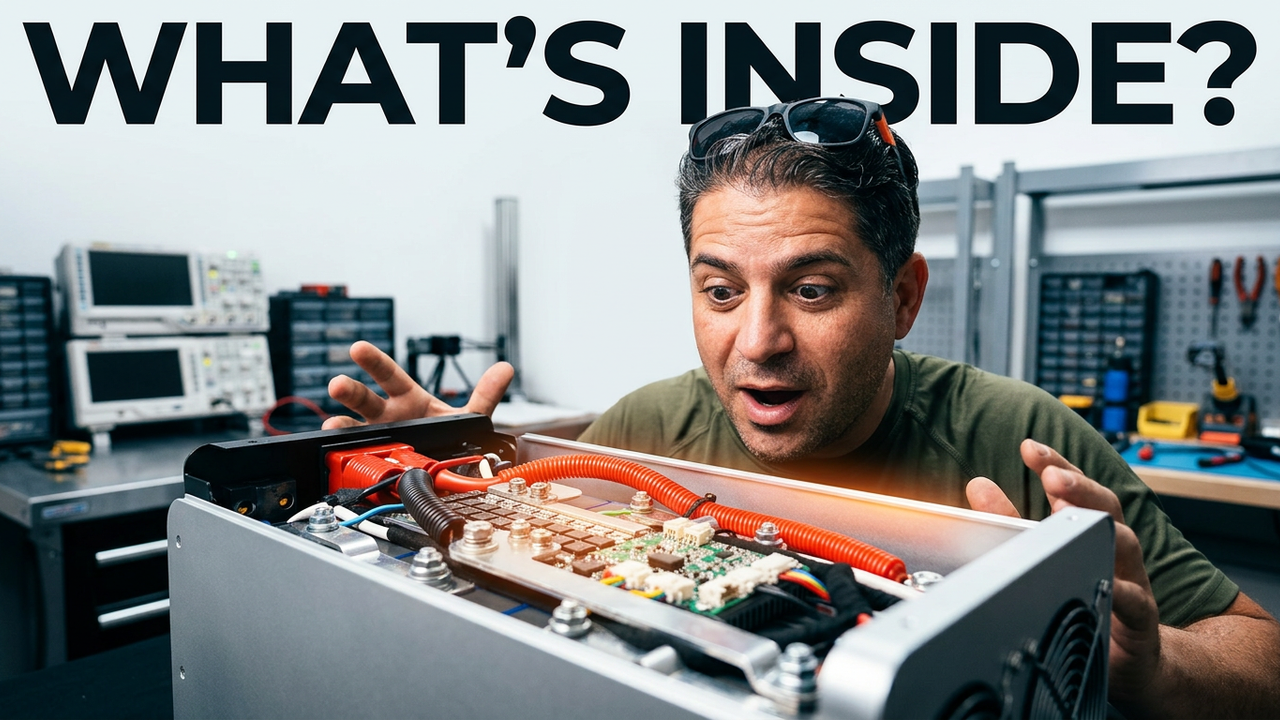
Opening up the Comvolt 2200 reveals a clean, industrial layout designed for high efficiency and safety:
-
Heavy-Duty Wiring: Battery connections utilize ultra-thick 6 AWG wiring rated up to 200°C, routed straight to industrial Anderson connectors.
-
Solar Controller & Ports: Integrated XT60 solar charge port rated for up to 400W input, feeding directly into an onboard solar charge controller.
-
Onboard Safety Fuses: The main control board features 5 user-accessible fuses directly on the PCB for surge protection.
-
Cell Configuration: Features four high-capacity cells running side-to-side in series (testing at ~3.29V per cell).
-
Cooling System: Dual high-CFM exhaust fans pull cool air across the internal inverter board and heat sinks.
Internal Observation: The 2200 chassis actually leaves a fair amount of breathing room around the cell compartment, ensuring optimal airflow and low thermal stress during continuous heavy loads.
Part 2: Comvolt 4200 Teardown — Packing Double the Energy
Moving on to the Comvolt 4200, the engineering accomplishment becomes immediately clear. Despite packing a massive 4,200 Wh capacity—nearly double the power of the 2200—the physical enclosure is only 2 inches longer and 0.25 inches taller.
To squeeze double the battery storage into virtually the same footprint, Comvolt completely redesigned the internal architecture:
-
Maximizing Every Inch: Every millimeter of internal space is utilized. The battery cells run side-to-side with solid copper bus bars linking the system.
-
Upgraded Thermal Management: Because of the dense cell packing, the 4200 steps up cooling with 4 total fans (2 in the back and 2 extra fans mounted in the front) along with massive aluminum heat sinks around the main inverter board.
-
Vertical BMS Board Placement: To fit the larger battery stack, the Battery Management System (BMS) board is mounted vertically along the side panel, positioning the onboard fuses toward the top for clean wire routing.
Side-by-Side Comparison: Comvolt 2200 vs. Comvolt 4200
| Feature / Spec | Comvolt 2200 | Comvolt 4200 |
| Capacity | ~2,200 Wh | ~4,200 Wh |
| Housing Dimensions | Compact Baseline | +2″ Length, +0.25″ Height |
| Cooling Fans | 2 Exhaust Fans | 4 Dual-Zone Fans |
| BMS Orientation | Horizontal Layout | Vertical High-Density Layout |
| Main Cable Spec | 6 AWG (200°C rated) | High-Current Solid Bus Bars & Heavy Cable |
| Solar Connection | XT60 (400W Max) | XT60 High-Efficiency Charge Controller |
| Serviceability | 4 mm Hex Aluminum Shell | 4 mm Hex Aluminum Shell |
Pro Tip for Reassembling Aluminum Power Station Cases
When putting the shell back on the Comvolt 4200 (or any metal-cased power station), follow this two-step assembly method to prevent cross-threading or misaligning screw holes:
-
Step 1 (Loose Alignment): Insert all 4 mm hex screws into their respective holes on both sides, turning them just enough to catch the threads. Leave them loose so the aluminum shell has enough “wiggle room” to adjust.
-
Step 2 (Final Torque): Once every screw is started in its threads, go around and tighten them down securely. This ensures perfect panel alignment without binding.
The Comvolt Off-Grid Ecosystem & Magic Modules
One of the biggest advantages of these power stations is how seamlessly they integrate into complete campervan electrical systems. Instead of spending weeks wiring individual relays, fuse blocks, switches, and heavy breakers, Comvolt offers an interconnected system.
By pairing a Comvolt power station with their Magic Modules, you can wire up an entire RV or campervan electrical system in about an hour. The modules handle high-draw AC/DC distribution, solar inputs, alternator charging, and all-weather protection automatically.
If you are planning an off-grid electrical setup or building out a campervan, explore these additional video guides and teardowns:
-
⚡ Comvolt Systems & Teardowns:
📽️ Related Van Build Guides & Climate Control Solutions
Executing a DIY campervan build requires choosing the right components for power, cooling, and charging on the road. Here are some essential tutorials from our build:
-
🥶 Climate & Off-Grid Air Conditioning:
-
🔋 Charging & Vehicle Integration:
-
🚐 Full Van Tours & Layouts:
🚐 Complete Sprinter Build Playlists (60+ Step-by-Step Videos Each)
Building out a Mercedes-Benz Sprinter? Follow along with every step of our high-roof and extended van build projects:
-
🎥 VS30 907 170 Extended Build Series: Watch the Full 60+ Video Playlist
-
🎥 170 High Roof Build Series: Watch the Full 60+ Video Playlist
-
🎥 Interactive 360° Campervan Tour: Explore the Van Interior
Final Thoughts
Opening up the Comvolt 2200 and 4200 proves that not all portable power stations are created equal. Comvolt’s decision to use heavy-duty aluminum shells, high-temperature 6 AWG wiring, user-accessible board fuses, and dense cell configurations makes these units a top-tier choice for DIY campervan builders and off-grid enthusiasts.
Watch the complete teardown video to see all the internal details up close, and drop a comment on YouTube if you have questions about custom van electrical setups!
SAVE ON COMVOLT HERE 🎟️
🛒 Comvolt 2.2kWh https://bit.ly/2200whUnitRF
🛒 4.2kWh Upgraded Unit (Top Choice): https://bit.ly/4200whUnitRFv2
🛒 3kWh Compact Unit: https://bit.ly/3000whUnitRFv2
🛒 Ultimate 6kWh Unit with Display + PDU: https://bit.ly/6000whUnitv2
🎟️ EXCLUSIVE DISCOUNT CODE: KO-Comvolt_RANDOMFIX101